
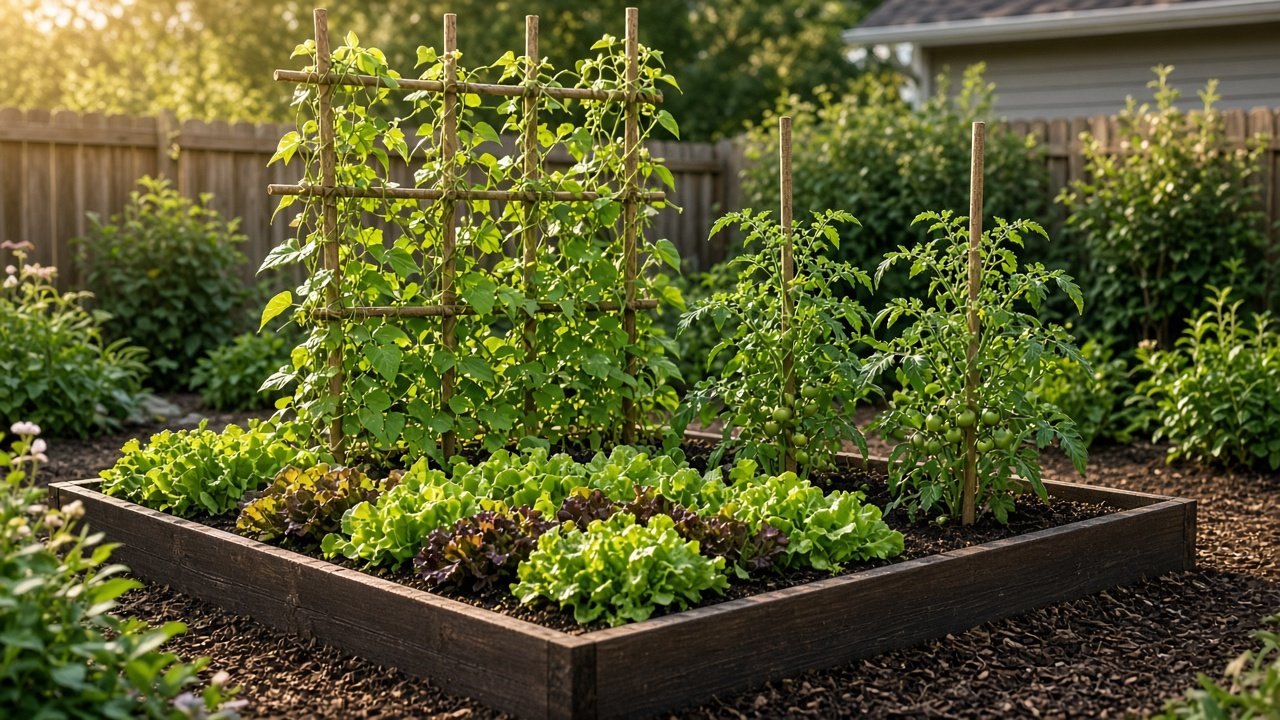
A small garden plot can feed you far better than most people expect. A single bed in the corner of a suburban yard, a strip along a fence, or a patch of lawn you’re happy to give up can grow salad greens, herbs, beans, tomatoes and more for months at a time.
The secret isn’t more space. It’s using the space you have a little more cleverly. This guide shows you how, step by step, without any special tools or gardening background.
Why a small plot is a smart way to start
Starting small isn’t settling. It’s the approach many experienced gardeners recommend to beginners, and for good reasons:
- It’s manageable. You can weed, water and harvest a small plot in a few minutes a day, so it stays a pleasure rather than a chore.
- Less money up front. Fewer bags of compost, fewer plants and less fencing or edging.
- Better soil, faster. It’s much easier to improve a small area properly than a big one halfway.
- You learn quicker. You’ll notice every pest, every thirsty plant and every success, and you’ll carry those lessons into next season.
If you’ve already tried a few pots (see our guide to container gardening for beginners), a small plot is a natural next step.
Step 1: Choose the right spot
Look for three things:
- Sun. Most fruiting vegetables, like tomatoes, peppers, squash and beans, do best with about six to eight hours of direct sun a day. Leafy greens and many herbs can cope with less.
- Easy access to water. A plot right next to the hose bib gets watered. One at the far end of the yard often doesn’t.
- Somewhere you walk past. A garden you see every day gets checked every day. That’s half the battle with pests and watering.
Try to avoid low spots where water pools after rain, and keep a little distance from large trees, whose roots compete for water and nutrients.
Step 2: Decide how big to go
For a first season, a good size is a single bed around 4 feet wide and 8 feet long. Four feet wide means you can reach the middle from either side without stepping on the soil. If that feels like too much, a 4×4 bed is a perfectly good start.
You can always add a second bed next year. It’s much harder to shrink a garden that’s become overwhelming.
Step 3: In the ground or a raised bed?
Both work. Here’s a quick comparison:
| In-ground plot | Raised bed | |
|---|---|---|
| Cost to start | Low | Higher (frame and soil) |
| Best for | Reasonable soil that drains well | Poor, rocky, clay or compacted soil |
| Bending and kneeling | More | Less, especially in taller beds |
| Warms up in spring | Slower | Faster |
| Watering | Holds moisture longer | Can dry out faster |
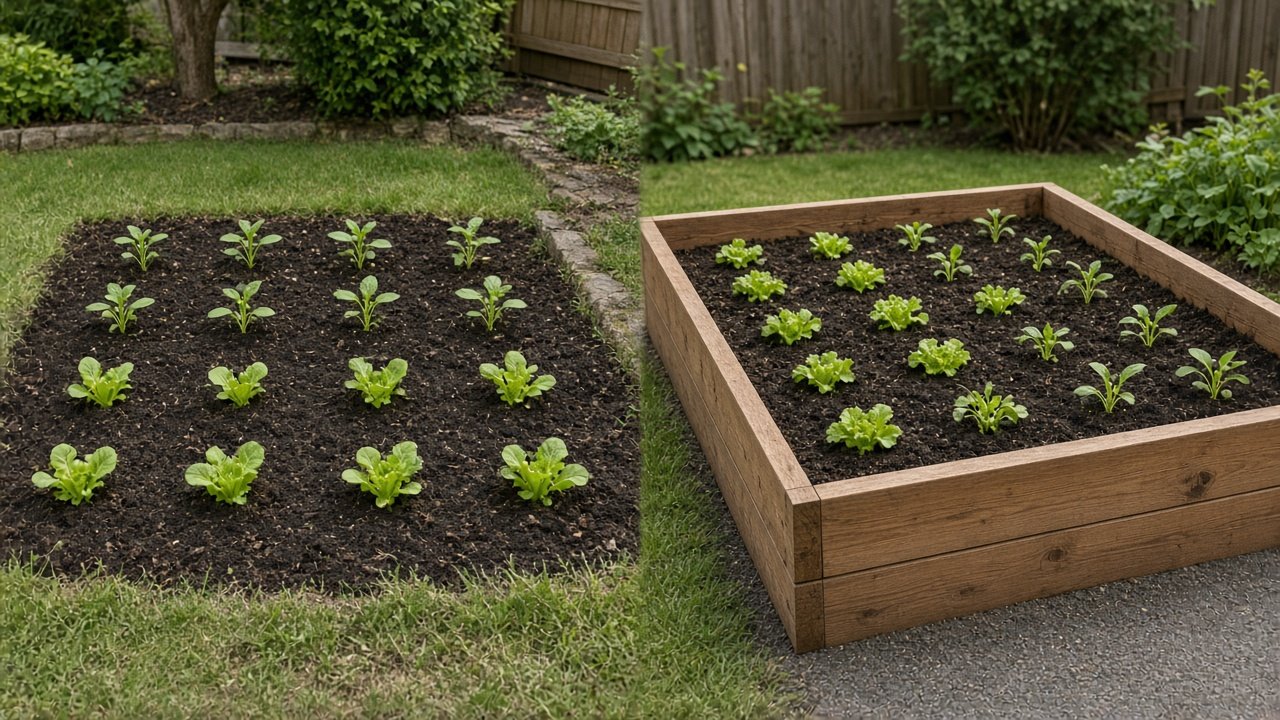
If your soil is hard clay, full of rubble or you’d rather not kneel, a raised bed is usually worth it. If you have decent soil, digging in plenty of compost and planting straight into the ground is the simplest option.
Step 4: Build good soil from the start
Good soil does most of the work for you. Before planting:
- Clear the area. Remove grass and weeds. One low-effort method is to cover the area with plain cardboard, wet it well and pile compost on top. The grass underneath breaks down over time. This works best if you can start a few weeks or months ahead.
- Add compost. Spread a generous layer of finished compost, a few inches deep, and mix it into the top of the soil.
- Consider a soil test. Many state Cooperative Extension offices offer inexpensive soil testing. A test tells you your soil’s pH and nutrient levels, so you’re not guessing about what to add. Search for “soil testing” plus your state’s extension service to find yours.
For raised beds, fill with a mix sold for raised beds or vegetable gardens, or a blend of quality topsoil and compost. Don’t fill a raised bed with straight potting mix or straight compost.
Step 5: Plant closer, and plan in blocks
Traditional long rows with wide paths between them were designed for big farms and tractors. In a small plot, they waste space.
Instead, try block planting: plant in a grid across the whole bed, with plants spaced at the distance the seed packet recommends between plants, and skip the wide gap between rows. Many beginners use a simple square-foot grid, dividing the bed into 1-foot squares and putting a set number of plants in each square depending on their size, for example one tomato in a square, or several lettuces or many radishes in another.
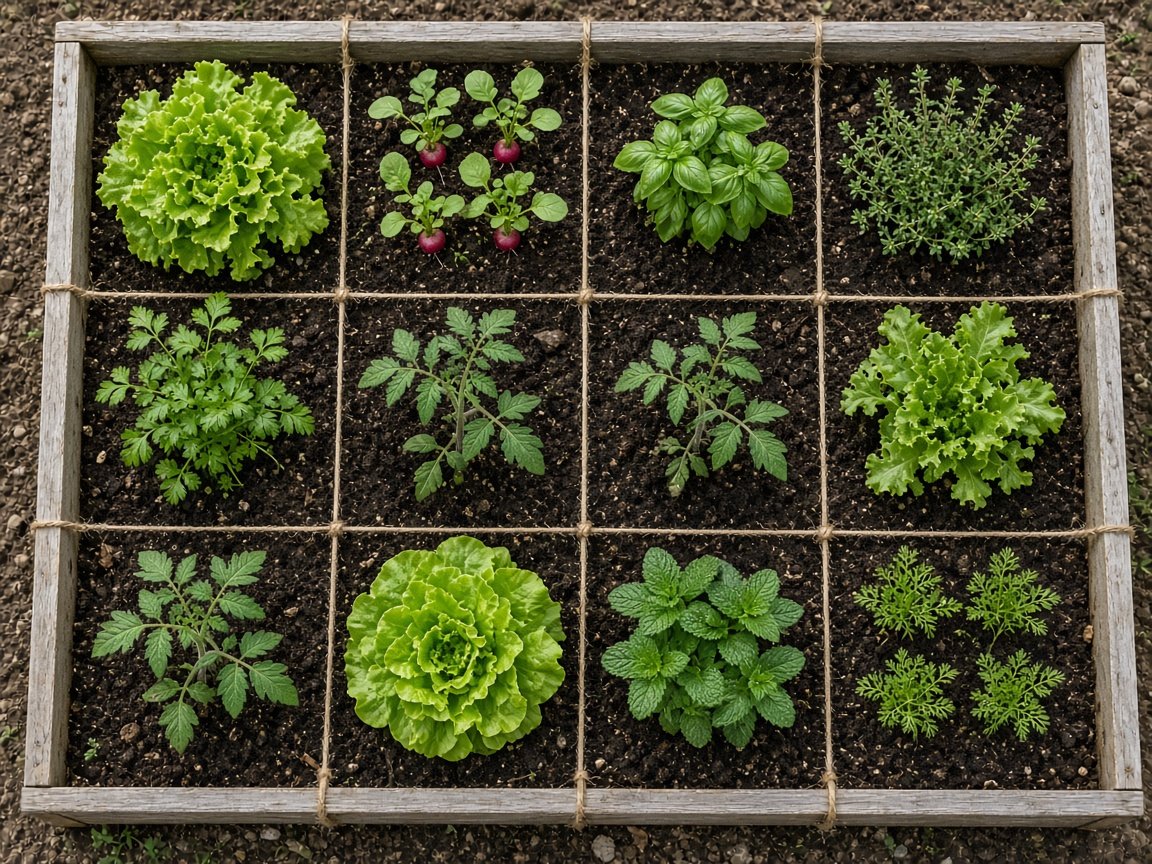
Two things to keep in mind:
- Don’t overcrowd. Close spacing works, but cramming plants together invites disease and smaller harvests. Follow the packet spacing.
- Put tall plants on the north side. In the US, tall crops like trellised tomatoes or pole beans on the north edge of the bed won’t shade the shorter plants.
Step 6: Grow up, not out
Vertical growing is one of the easiest ways to get more from a small plot. Climbing and vining crops can go up a trellis, an arch, a fence or a simple teepee of stakes instead of sprawling across the bed:
- Pole beans and peas
- Cucumbers
- Indeterminate (vining) tomatoes, tied to stakes or cages
- Small winter squash and melons, with a sturdy support and slings for heavier fruit
That frees the ground underneath for lettuce, herbs or other low growers, which often appreciate a little afternoon shade in summer.
Step 7: Keep the harvest coming
A small plot really shines when something is always growing. Three simple habits help:
- Succession planting. Instead of sowing all your lettuce at once, sow a short row or a few squares every two to three weeks. You’ll get a steady supply instead of a glut followed by nothing.
- Fill the gaps. When a crop finishes, replant that space right away with something else suited to the season.
- Interplanting. Quick crops like radishes and lettuce can grow between slower crops like tomatoes or peppers and are usually harvested before the big plants need the room.
Step 8: Water and mulch wisely
Small plots are easy to water well, which is good news, because steady moisture makes a big difference to how vegetables grow.
- Water deeply, not just often. A good soak that reaches the roots is better than a quick daily sprinkle. Check by pushing a finger a couple of inches into the soil. If it’s dry, water.
- Water the soil, not the leaves. Morning watering at the base of plants helps reduce leaf diseases. A soaker hose or simple drip line laid along the bed makes this easy.
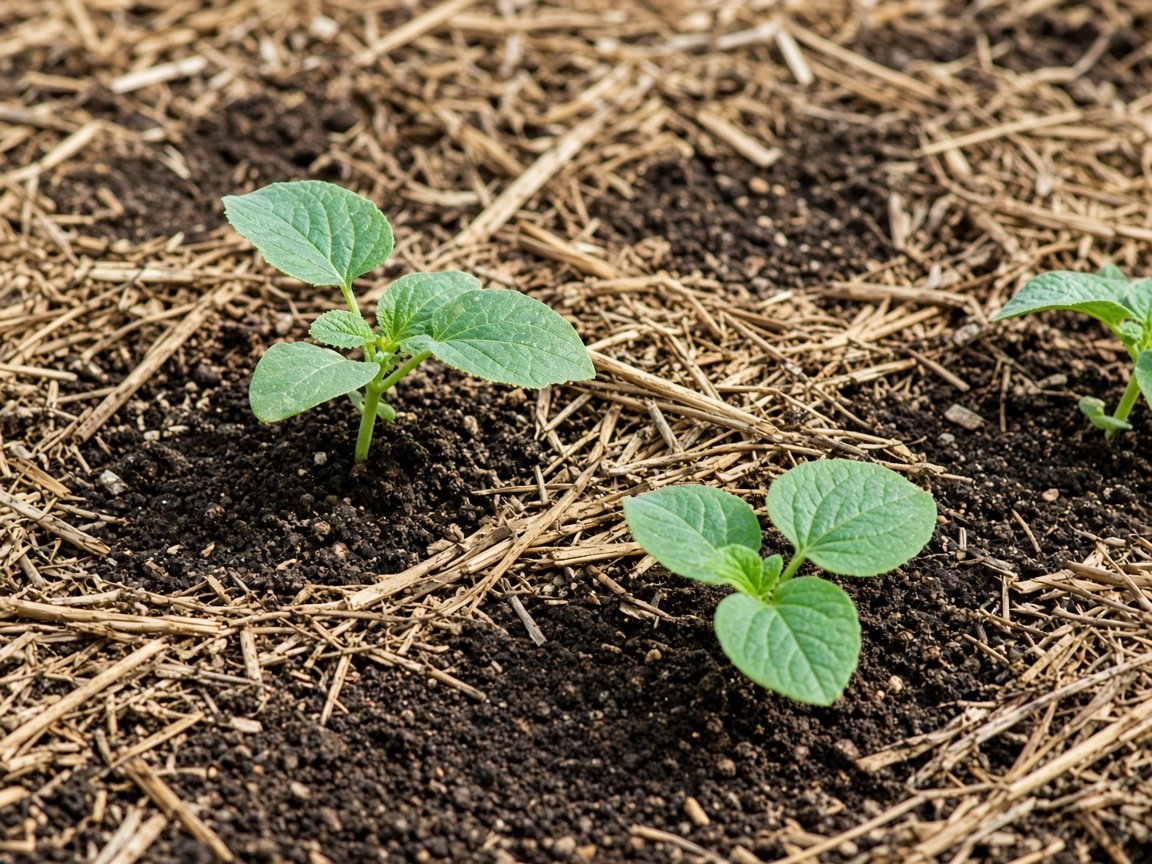
- Mulch. A layer of straw, shredded leaves or wood chips on the soil surface helps hold in moisture, keeps soil temperatures steadier and smothers many weeds. Keep mulch pulled back slightly from plant stems.
If watering is your biggest worry, our short guide Less Thirsty Gardening covers simple ways to build soil that holds water longer, including hugelkultur-style beds. Find it in our shop.
What to grow in a small plot
Choose crops that give you a lot of food for the space they take, and that you actually like to eat. Good beginner picks include:
| Crop | Why it suits a small plot |
|---|---|
| Lettuce and salad greens | Fast, compact, and you can pick leaves for weeks |
| Bush or pole beans | Productive, easy from seed; pole beans grow upward |
| Cherry tomatoes | Heavy croppers when staked or caged |
| Zucchini | Very productive; one or two plants is usually plenty |
| Swiss chard and kale | Harvest outer leaves again and again |
| Radishes | Ready quickly; perfect for filling gaps |
| Herbs (basil, parsley, chives) | Small, useful and pricey to buy fresh |
Crops like corn, pumpkins and large sprawling squash take a lot of room for what you get, so most small-plot gardeners leave them for later or grow a single compact variety.
Plant at the right time for your area
Timing depends on where you live. Find your zone on the USDA Plant Hardiness Zone Map, then check your local average last spring frost date with your state’s Cooperative Extension service. Cool-season crops like lettuce, peas and kale go in around or before that date. Warm-season crops like tomatoes, beans and zucchini go in after the danger of frost has passed and the soil has warmed.
Common beginner mistakes (and easy fixes)
- Starting too big. Begin with one bed. Add more once it feels easy.
- Skipping the soil prep. Compost first, plant second. It pays off all season.
- Planting everything at once. Stagger sowings for a longer harvest.
- Stepping on the beds. It compacts the soil. Keep beds narrow enough to reach across.
- Forgetting the supports. Put trellises and stakes in at planting time, before roots spread.
A simple first small-plot plan
Here’s an easy layout for a 4×8 bed:
- North edge: a trellis with pole beans or cucumbers, plus two staked cherry tomatoes.
- Middle: one zucchini at one end, and a few squares of Swiss chard or kale.
- South edge: lettuce and radishes, sown in small batches every few weeks, plus a corner of basil and parsley.
That’s enough to keep fresh food coming to your kitchen for much of the growing season, with room to experiment.
Start where you are
A small plot is one of the most rewarding ways to grow your own food. You don’t need perfect soil, a big budget or years of experience, just a sunny spot, some compost and a willingness to learn as you go.
Pick your spot this week, mark out a bed, and start building your soil. Your future self, picking tomatoes in July, will thank you.
Want more simple, practical ideas like this? Join The Self-Reliant Life, our free weekly newsletter, for beginner-friendly tips on growing food, preparing your home and saving money.